Blackout Font J to R: The Embroidery Font That Delivers Impact, Clarity, and Versatility
When you’re stitching names onto baby blankets, personalizing graduation caps, or adding elegant dates to wedding keepsakes, the font you choose does more than spell out letters—it sets the tone, conveys care, and reinforces quality. Blackout Font J to R stands apart in the embroidery world not because it’s flashy or ornate, but because it’s intentionally bold, consistently legible, and engineered for real-world machine performance.
What Makes Blackout Font J to R Different from Other Embroidery Fonts?
Most embroidery fonts fall into one of two categories: overly delicate scripts that struggle with stitch stability—or blocky, generic sans-serifs that lack character. Blackout Font J to R bridges that gap. It’s a high-density, monoline embroidery font designed specifically for clarity at small-to-medium sizes (typically 0.5" to 2.5" tall), with optimized stitch paths that minimize thread breaks, puckering, and under-stitching issues.
Unlike standard TrueType fonts converted for embroidery—where spacing, jump stitches, and density are often inconsistent—Blackout Font J to R arrives as a fully digitized, production-ready set. Each letter is individually balanced for stitch count, travel distance, and fabric interaction. That means “J” doesn’t pull more than “R”, and “T” won’t collapse under its own top bar when stitched on lightweight cotton.
Designed for Fabric, Not Just Screens
Embroidery isn’t printing. Thread has thickness. Fabric stretches. Machines have tension limits. Blackout Font J to R accounts for all of this. Its vertical strokes are slightly tapered—not rigidly uniform—to reduce thread buildup. Curves are simplified without sacrificing recognition: the loop of “R” is open enough to avoid dense knotting; the tail of “J” flows smoothly into the next character without awkward pauses or excess trims.
This attention to physical behavior translates directly to fewer stops mid-design, less rehooping, and cleaner results—even on challenging materials like fleece, knit polos, or textured linen blends.
Why You’ll Reach for Blackout Font J to R Again and Again
Think about your most frequent embroidery tasks: monogramming towels, labeling school uniforms, embroidering team names on sports gear, or creating heirloom-style baby onesies. In each case, readability, speed, and reliability matter more than decorative flair.
- Names: Whether it’s “Julian”, “Kai”, “Lila”, or “Remy”, Blackout Font J to R handles varied letter combinations with consistent kerning. No awkward gaps between “V” and “A”, no cramped “T” + “R” collisions.
- Dates: From “June 2024” to “12.07.2025”, numerals align cleanly with letters—no floating periods or misaligned digits. The zero has a subtle slash, preventing confusion with “O” in quick-glance contexts like event banners or tote bags.
- Short Quotes & Phrases: Think “Joy”, “Brave”, “Home”, or “Est. 2023”. With tight tracking and strong contrast, even single words hold visual weight without needing outlines or fills.
You don’t need to adjust letter spacing manually. You won’t spend 20 minutes tweaking a “Q” to stop dragging. And you won’t second-guess whether “R” will stitch cleanly on a curved surface like a baseball cap brim—because Blackout Font J to R was tested across those exact use cases.
Multiple File Formats, One Seamless Workflow
No matter which embroidery machine you rely on—Brother, Janome, Bernina, Baby Lock, or commercial Tajima or Barudan systems—you’ll find native support. The Blackout Font J to R package includes ready-to-load files in:
- PES (for Brother and many home machines)
- JEF (Janome and Elna)
- HUS (Husqvarna Viking)
- VP3 (Bernina)
- DST (industry-standard for commercial multi-heads)
- EXP (Melco-compatible)
There’s no conversion step. No risk of distorted outlines or lost underlay. Just select your format, import into your embroidery software (like Embrilliance, Wilcom E4, or Pulse), type your text, and go. Some users even integrate Blackout Font J to R directly into their design libraries for one-click access during batch jobs—ideal for small businesses handling personalized orders daily.
Real-World Fit Across Industries and Lifestyles
A custom apparel shop in Austin uses Blackout Font J to R for employee name badges on performance polo shirts—its clean lines hold up after repeated washes and industrial drying. A quilter in Maine chooses it for labeling handmade baby quilts because the dense stitch coverage prevents fraying at letter edges. A church group embroiders youth camp T-shirts with names and Bible verses—and reports near-zero thread breaks across 80+ garments, thanks to the font’s balanced density.
Even hobbyists benefit. If you’ve ever abandoned a font halfway through stitching because the “S” looked muddy or the “R” snagged mid-run—you’ll notice the difference immediately with Blackout Font J to R. It’s forgiving without being generic. Distinctive without being demanding.
Smart Considerations Before You Use It
While Blackout Font J to R excels in many scenarios, it’s worth knowing where it shines brightest—and where alternatives might be better suited.
It’s ideal for medium-to-large text (0.75" and up) on stable fabrics. On ultra-fine silk or loosely woven gauze, consider stabilizer pairing: a light tear-away plus optional topping for crisp edges. For tiny text under 0.4", test first—some machines may require slight manual density reduction.
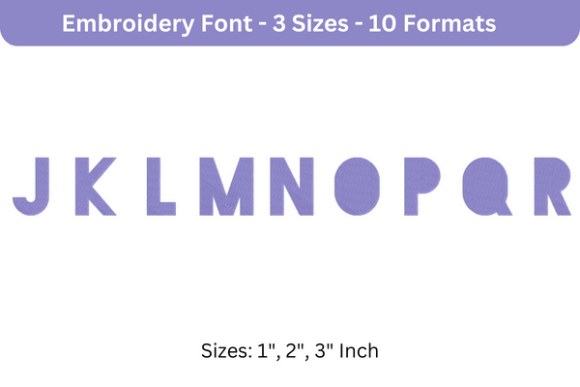
Also, keep in mind that Blackout Font J to R covers uppercase letters J through R only—not the full alphabet. That’s intentional: it’s part of a modular system meant for focused, high-impact applications (e.g., initials, acronyms, short identifiers). If you need full A–Z coverage, check for companion sets—but for name tags, event signage, or date-stamped gifts, J to R often covers exactly what you need, without bloat or unnecessary file clutter.
And yes—it works beautifully with satin stitch borders, shadow effects, or subtle fill backgrounds. But its strength lies in standing alone: confident, unadorned, and unmistakably legible.
How to Get the Most Out of Your Blackout Font J to R Files
Start simple. Type “JUNE” or “RILEY” in your software, set size to 1.25", and run a test stitch on scrap fabric matching your final project. Observe how corners lock, how curves flow, and how adjacent letters interact.
Then experiment:
- Try layering Blackout Font J to R over a subtle geometric motif—its boldness creates instant hierarchy.
- Use it for pocket embroidery on denim jackets: the font’s structure holds up against abrasion and fading.
- Pair it with a thin script font for contrast—e.g., “JULIAN” in Blackout Font J to R, followed by “est. 2024” in a lighter complementary style.
Many users report faster setup times and higher client satisfaction when they standardize on Blackout Font J to R for core identification work. It removes guesswork. It builds trust—in your process, your machine, and your finished piece.
Whether you're stitching for love, livelihood, or legacy, the right font quietly elevates everything it touches. Blackout Font J to R doesn’t shout. It states. It anchors. It endures—stitched, washed, worn, and remembered.