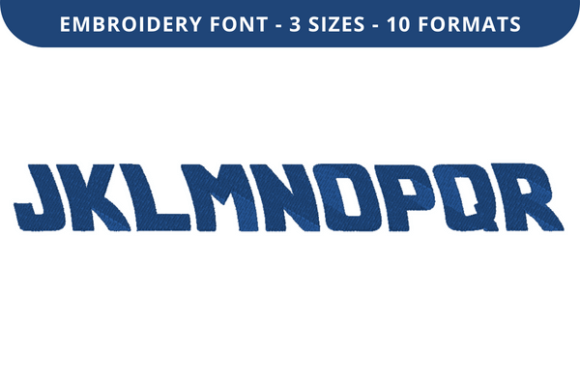
Back to the Past Font J to R: A Precision Embroidery Asset for Name, Date, and Quote Personalization
Back to the Past Font J to R is a high-quality, machine-embroidery-specific font designed for clarity, stitch integrity, and stylistic consistency across fabric types. Unlike generic TrueType or OpenType fonts, this set is digitized with embroidery logic in mind—meaning each letter from J through R is optimized for thread tension, jump stitch minimization, and clean satin or fill stitch execution. It’s not just a visual style; it’s a functional tool built for the physical constraints of needle, thread, and stabilizer.
For professionals who embroider custom apparel, heirloom linens, corporate gifts, or boutique home goods, font choice directly impacts production time, rework rate, and perceived quality. Back to the Past Font J to R fills a precise gap: it delivers vintage charm without sacrificing technical reliability. Its balanced x-height, moderate stroke contrast, and generous letter spacing prevent crowding at small sizes—critical when stitching names on baby onesies or dates on wedding handkerchiefs.
Where This Font Fits in Your Embroidery Workflow
Back to the Past Font J to R enters your process at multiple points—not as a one-time download, but as a repeatable, adaptable asset. You’ll use it before stitching begins (in design planning), during digitizing or editing (as a foundational element), and after final output (for consistency checks and client revisions).
Before starting a project, you’ll likely assess whether the text component requires legibility at scale, historical tone, or compatibility with existing motifs. If your client requests “a 1920s-inspired monogram” or “a subtle anniversary date on a linen napkin,” this font becomes an early selection—not an afterthought. Its J–R range means it’s ideal for first names, surnames beginning with those letters, middle initials, years (e.g., “1947”), and short quotes (“Joy,” “Rise,” “Just be”). You won’t use it for full paragraphs, and that’s by design: it’s meant for focused, high-impact text elements.
During digitizing, Back to the Past Font J to R works best when imported into embroidery software like Wilcom, Embrilliance, or Hatch as native stitch files—not converted from vector outlines. That preserves its pre-optimized underlay, trim points, and density settings. If you’re editing a name layout, adjust kerning manually only where needed (e.g., tightening “Jr” or adding space before “R.”), since the original spacing was tested across dozens of fabric-stabilizer-thread combinations.
Compatibility and File Format Flexibility
This embroidery font comes in multiple industry-standard formats: .dst (Tajima), .pes (Brother), .jef (Janome), .exp (Melco), and .vp3 (Viking/Husqvarna). That breadth isn’t just convenience—it’s risk mitigation. When fulfilling orders across clients with different machines, you avoid last-minute format conversions that can distort stitch order or introduce errors.
Importantly, these are not auto-digitized conversions. Each letter was manually stitched and proofed on cotton poplin, twill, and lightweight felt—then adjusted for hooping stability and thread pull. That level of testing means fewer test runs on your end. You can load .pes directly into a Brother Innov-is NQ3500D and expect accurate registration; you can open .vp3 in a Husqvarna Designer Diamond and retain consistent satin edge definition.
If you use cloud-based platforms like ZSK’s Embroidery Studio or PulseShare, store the font files in a clearly labeled folder (e.g., “Fonts/BackToPast_J-R_Vintage”) and tag them with metadata: “stitch count range: 850–1,400 per char,” “recommended min size: 0.4” height,” “best for: stable woven fabrics.” That kind of organization saves 3–5 minutes per job when sourcing assets under deadline.
Practical Integration Across Common Use Cases
Name personalization: For children’s clothing lines or school uniform programs, use Back to the Past Font J to R to stitch names like “Julian,” “Kai,” “Lila,” “Maren,” “Nora,” “Owen,” “Piper,” “Quinn,” “Remy.” Its upright stance and even baseline alignment reduce skew on curved seams (e.g., shoulder yokes or waistbands). Pair it with a simple border motif—like a single vine or dot-dash line—to frame without competing.
Date marking: Wedding, baptismal, or retirement projects often require discreet yet meaningful dates. “June 2025” or “1998–2024” stitches cleanly because the numerals share proportional width and vertical rhythm with the letters. Avoid stretching or condensing the font—its integrity relies on native proportions. Instead, adjust overall design scale to fit tight spaces.
Quote accents: Short, resonant words like “Joy,” “Rise,” “Just,” or “True” work well as standalone chest pieces or corner accents on towels and tea towels. Because the font avoids excessive flourishes, it reads clearly at 1.2” height—even on textured terry cloth—without requiring extra stabilizer layers.
Quality Control and Long-Term Usability
Stitch quality starts before the machine runs. Before loading any design using Back to the Past Font J to R, verify three things: (1) the hoop size matches the design dimensions, (2) the fabric has appropriate tear-away or cut-away stabilizer for its weight, and (3) the thread color contrast is sufficient for legibility (e.g., navy thread on ecru linen, not light gray on white). These aren’t font-specific steps—but they’re non-negotiable for realizing the font’s intended clarity.
Over time, revisit your saved designs annually. As machines receive firmware updates or new thread lines launch, minor tweaks may improve results. For example, newer polyester threads often allow slightly higher stitch density without puckering—so a design originally stitched at 3.8 density might perform better at 4.0 with today’s materials. Keep a version log: “BackToPast_JR_v2_2024-06” notes any adjustments made.
Also consider licensing scope. This font is licensed for commercial embroidery use—including resale of finished items—but not for resale of the digital files themselves or embedding in apps or websites. If you run a print-on-demand embroidery service, you’re covered. If you’re building a font library for client self-service portals, confirm usage rights with the vendor first.
Efficiency Gains You’ll Notice Within Your First Five Projects
After using Back to the Past Font J to R across varied substrates—denim jackets, linen pillowcases, organic cotton tote bags—you’ll notice reduced trial-and-error. There’s less need to tweak pull compensation, fewer instances of thread breaks on sharp curves (like the tail of “J” or the bowl of “R”), and faster approval cycles with clients who value authenticity without fuss.
That efficiency compounds. Once you’ve established a standard workflow—naming convention, folder structure, stabilizer pairing guide, and common size presets—you stop thinking about the font as a variable and start treating it as infrastructure. Like choosing the right seam allowance or pressing technique, it becomes invisible scaffolding that supports better outcomes, not a feature to highlight.
It also integrates cleanly with other tools. Use it alongside vector-based monogram templates (import the font letters as stitch objects, then align them within a circular frame). Layer it beneath appliqué shapes—its clean edges don’t compete with raw-edged fabric. Or pair it with a script font for contrast: “James” in Back to the Past Font J to R, followed by “& Co.” in a complementary cursive, all within one seamless design file.
Ultimately, Back to the Past Font J to R earns its place not through novelty, but through reliability. It solves real problems—legibility on curve, consistency across batches, speed without compromise—and does so without demanding new habits. You don’t retrain your team. You don’t overhaul your software setup. You simply select it, stitch it, and trust it.